A Beginners Guide to Canning Your Own Food
1. Introduction to Canning
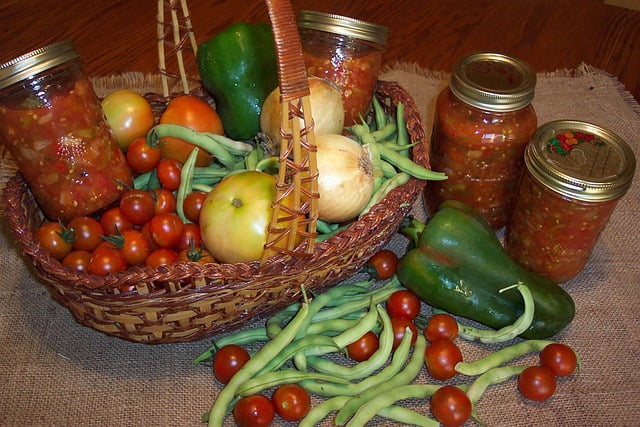
A Beginners Guide to Canning Your Own Food. Canning is a preservation method that involves placing foods in jars and heating them to a temperature that destroys microorganisms and inactivates enzymes. This process forms a vacuum seal, preventing new bacteria from entering and spoiling the food. Canning allows you to enjoy your fresh from the garden bounty year-round.
2. Essential Equipment for Canning
To start canning, you’ll need the following equipment:
- Canning jars with lids and bands
- Large pot (for water bath canning) or pressure canner (for pressure canning)
- Jar lifter
- Funnel
- Bubble remover/headspace tool
- Clean towels
- Labels and marker (for dating your jars)
3. Preparing Your Homegrown Produce
Freshness is key for successful canning. Harvest your fruits and vegetables at their peak ripeness and can them as soon as possible to retain their flavor and nutritional value. Wash all produce thoroughly to remove dirt, pesticides, and bacteria.
4. Types of Canning Methods
There are two primary methods of canning: water bath canning and pressure canning. The method you choose depends on the acidity of the food you are preserving.
Water Bath Canning
Suitable for high-acid foods such as fruits, tomatoes, pickles, and jams. This method involves boiling the filled jars in a large pot of water.
Pressure Canning
Used for low-acid foods like vegetables, meats, poultry, and seafood. A pressure canner reaches higher temperatures necessary to safely preserve low-acid foods.
5. Step-by-Step Canning Process
Sterilizing Jars
- Wash jars, lids, and bands in hot soapy water. Rinse thoroughly.
- Place jars in a large pot, cover with water, and bring to a boil. Boil for 10 minutes to sterilize.
- Keep jars hot until ready to use by leaving them in the hot water or placing them in a warm oven.
Preparing the Produce
- Peel, pit, core, or chop fruits and vegetables as needed.
- Blanch vegetables by boiling them briefly and then plunging them into ice water to stop the cooking process.
- Prepare any syrups, brines, or sauces as per your recipe.
Filling the Jars
- Use a funnel to fill jars with prepared produce, leaving appropriate headspace (usually 1/2 inch for fruits and tomatoes, 1 inch for vegetables and meats).
- Remove air bubbles by sliding a bubble remover or a non-metallic spatula around the inside edge of the jar.
- Wipe the rim of the jar with a clean, damp cloth to ensure a good seal.
Sealing and Processing the Jars
- Place the lids on the jars and screw on the bands until fingertip tight.
- Place jars in the canner using a jar lifter, ensuring they do not touch each other.
- Process according to your recipe, adjusting for altitude if necessary. For water bath canning, ensure jars are covered by at least 1-2 inches of water. For pressure canning, follow the manufacturer’s instructions.
Cooling and Storing the Jars
- After processing, remove jars using a jar lifter and place them on a towel-lined surface, allowing them to cool undisturbed for 12-24 hours.
- Check seals by pressing down on the center of each lid. If it does not pop back, the jar is sealed. If it pops back, refrigerate and use within a few days.
- Label jars with contents and date. Store in a cool, dark place.
6. Safety Tips for Canning
- Always use tested recipes from reliable sources.
- Adjust processing times for altitude.
- Never reuse lids.
- Inspect jars for cracks or chips before use.
- If a jar doesn’t seal, refrigerate and use within a few days.
7. Common Mistakes and Troubleshooting
- Jars not sealing: Ensure rims are clean and lids are properly applied.
- Siphoning (liquid loss during processing): Avoid overfilling jars and ensure proper headspace.
- Cloudy liquid: May be caused by using table salt instead of canning salt, or minerals in water. Use distilled water if necessary.
8. Delicious Canning Recipes
- Strawberry Jam: Combine 4 cups of crushed strawberries, 4 cups of sugar, and 1 packet of pectin. Bring to a boil, pour into jars, and process in a water bath canner for 10 minutes.
- Dill Pickles: Pack cucumber spears into jars, add dill and garlic, fill with hot brine (water, vinegar, salt), and process in a water bath canner for 15 minutes.
9. Frequently Asked Questions
- Can I reuse jars and lids? You can reuse jars, but always use new lids to ensure a proper seal.
- How long does home-canned food last? Properly canned and stored food can last up to a year.
- What if my jar doesn’t seal? Refrigerate and consume within a few days or reprocess within 24 hours.
A Beginners Guide to Canning Your Own Food
10. Conclusion
Canning is a rewarding way to preserve your homegrown produce, providing delicious and nutritious food throughout the year. By following the proper methods and safety guidelines, you can enjoy the fruits of your labor long after the growing season ends. Happy canning!
